
Cloud Fax User Guide
Introduction
Welcome to Cloud Fax by CTC. Within this document, you will learn how to setup and manage your account, as well as to send and review received faxes.
After Requesting Cloud Fax Service
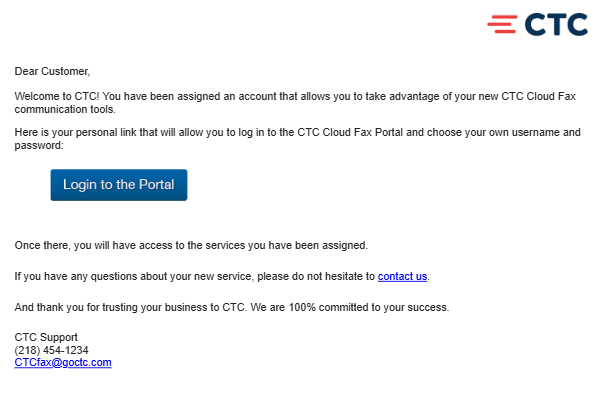
After you have requested Cloud Fax by CTC, our provisioning team will begin building your user account within the system. At the time your account is created, you will receive an email from ctcfax@cloudfax.goctc.com. (You may need to check your junk folders).
This will include a link to finish setting up your account. You will be asked to set up a password. Once you assign a password, you will be brought into your Customer Administration Portal.
A CTC representative will email you directly once your number is fully operational within the Cloud Fax platform. This can take a few days to become fully active. You can then access the Cloud Fax service at https://fax.goctc.com
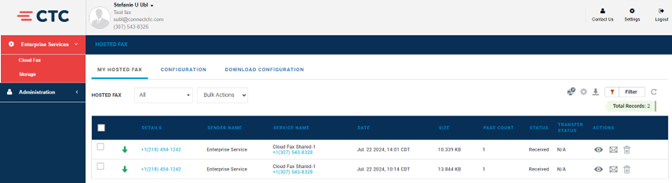
Cloud Fax provides the convenience of a private fax machine right in your browser and is managed in the web-based Customer Administration Portal.
Sending a Fax
Any user given access to Cloud Fax can easily send a fax from the Customer Administration Portal.
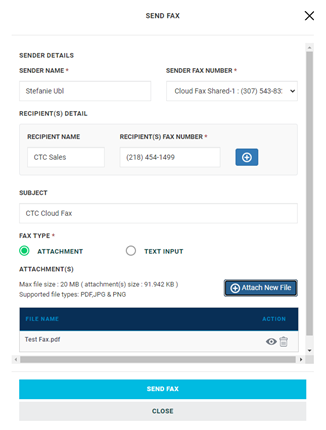
- In the Hosted Fax widget, click on the Send Fax button. A box will pop up.
- Your name will be automatically filled in the Sender Name box. Choose the Sender Fax Number (if applicable).
- Enter the Recipient’s name, and Recipient’s Fax Number by filling in the appropriate text boxes. Click + to add multiple recipients.
- NOTE: To send fax to multiple recipients, add multiple recipients like you would add multiple email addresses.
- Enter a subject line in the email.
- Attach the document to be faxed to the email.
- Enter a subject line for the fax.
- Choose whether the fax content will be sent as an attachment or if you’ll type out the text to be faxed. To attach a document, click the + button. You will be able to navigate through your desktop to find the document(s) you wish to send. To send text, type in the information.
- ATTACHMENT(S)
- Max file size : 20 MB (attachment(s) size: 91.942 KB)
- Supported file types: PDF, JPG & PNG
- ATTACHMENT(S)
- Send fax by clicking the light blue Send Fax button on the bottom.
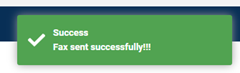
- Once the fax is sent, the Send Fax dialog closes and you will see the alert, “Fax Sent Successfully” in the upper right-hand corner.
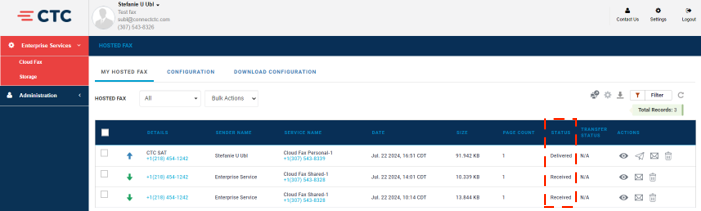
To confirm if the fax reached your recipient, check the status in the Status Column. You can also change your settings to receive an email when a fax is sent successfully or not.
Receiving Fax
Faxes can be received directly to your email or in the Customer Administration Portal based on settings and configuration. When you receive a fax via email, you will receive an email with a PDF file attached.
View Sent/Received Faxes
To view faxes previously sent or received and stored within the Customer Administration Portal:
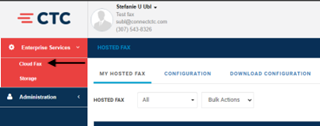
- Click on the Enterprise Services Tab.
- Locate the Cloud Fax widget.
- The following information is available for each file: Type (Incoming or Outgoing fax), User (You), Details (Recipient or Sender of fax, Date and Time fax was sent or received), Status (Sent – Pending Delivery, Delivered, Failed), Actions (Delete, View, Email, Resend Fax)
To Email or Delete Multiple Files from Your Storage

- Click on the small box next to the document icon within each file.
- Click all files to perform the desired action.
- Click Actions in the lower left-hand corner of the widget.
- Click the Email or Delete icon. If emailing, a box will appear to input the recipient’s email address. If deleting, a box will appear for you to confirm the deletion.
To Perform Actions on a Single File
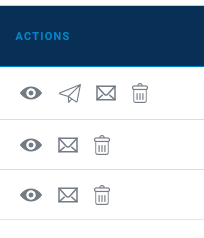
- To perform actions on a single file you can use the actions column on the far right.
- You can view , resend , email , or delete.
Manage Settings
Manage the outgoing and incoming settings of each fax from within your Customer Administration Portal.
To change settings
- In the Hosted Fax dropdown, select the fax for which you want to change settings.
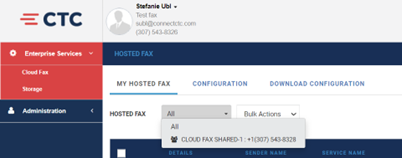
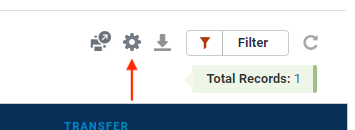
- Click Settings
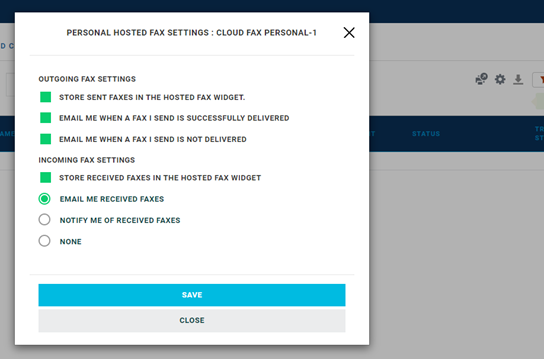
Edit the following outgoing fax settings
- Store sent faxes in Hosted Fax Widget. Faxes stored in the Customer administration portal will be counted towards storage limit.
- Email when fax is successfully delivered. This will send a notification when faxes are delivered.
- Email when fax is not delivered. This will send a notification when a fax is not able to be delivered.
Edit the following incoming fax settings
- Email me received faxes. When this is activated, you will receive faxes via email. This will make the service HIPAA non-compliant.
- Notify me of received faxes. You will receive a notification when faxes have been received by this fax number.
- None. When this is selected, you will neither receive notice nor receive the faxes in your email.
- Click Save.
Configuration
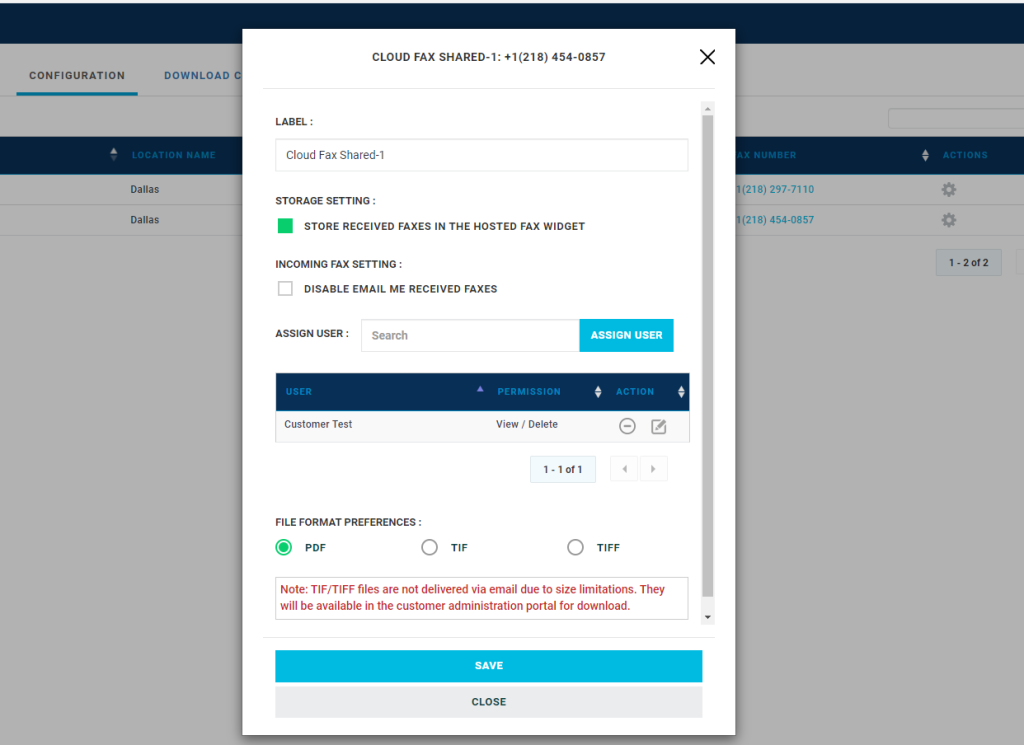
The configuration tab is an admin only option to view and manage all Cloud Fax accounts. To configure a fax, see the list of all fax products in your service, choose the one you want to manage, then click the Actions icon.
Cloud Business Fax
In the configuration window you can do the following:
- Enter a Label for your Hosted Fax. A meaningful label will help you with quick identification.
- Select if you want to store received faxes in the widget.
- You can Disable Email Me Received Faxes to stop getting emails of the faxes. This is a required setting for HIPAA compliance.
- NOTE: If you chose not to store fax in Customer Administration Portal, admins and users with view and delete permissions will need to change individual settings to email faxes to them.
- Assign Users who can send fax from this account by selecting users from the dropdown box.
- Click edit to set the following with the Edit Permission icon:
- View, download and email faxes sent to this fax number
- Delete faxes sent to this fax number.
- Unassign a user with the Unassign icon.
- Click Save.
- NOTE: If you chose not to store fax in Customer Administration Portal, admins and users with view and delete permissions will need to change individual settings to email faxes to them.
Create Additional Users
In the Administration section, the Administration and Access widget has controls at the top that will allow you to add users. Press the “+ User” button to launch the Add User window.

Complete the required fields for the user in the Add User window
- The required fields are “First Name”, “Last Name”, and “Email Address”.
- By default, a user will be an End-User. You can use the Role drop-down to make the user an Admin.
- Continue to create the number of users you need. Each user will receive an email to the email address you input will receive the email with the “Login to Portal” link.
- Next, complete the Configuration step above to get the new users assigned to the group fax and edit their permissions as you see fit.
Download Configuration
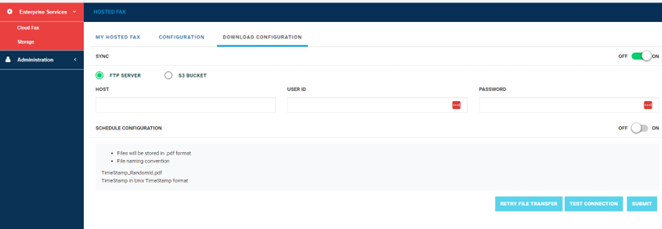
Rather than managing your storage space in the cloud, you can Sync your faxes to your own FTP Server or an AWS S3 Bucket.
Sync
- Turn on Sync to begin the process.
- Enter the information for your server, such as Host name, User ID, and Password. You can test the connection at the bottom.
Schedule Configuration
You can Schedule deletion of the cloud stored faxes by turning on Schedule Configuration and selecting the interval from the drop-down box.
The details for the vile formatting and naming will be detailed under the Delete Fax selector.
Support
For additional help, contact our support team at 218-454-1234.
